SCIENTIFIC ACHIEVEMENT
Advanced Light Source (ALS) researchers, in collaboration with software and nanofabrication small businesses, developed a way to improve the accuracy of instruments that measure the surfaces of x-ray mirrors.
SIGNIFICANCE AND IMPACT
The work significantly improves the quality of the data needed for fabrication and optimal performance of advanced x-ray beamlines and space telescopes.

A true reflection of reality
In eyeglasses, cameras, and telescopes, lenses need precisely curved, smooth surfaces to recreate sharp, accurate images with visible light. With x-rays, focusing is done by mirrors instead of lenses, with lower tolerances for error, given the smaller wavelengths of x-ray light. Thus, the ability to accurately measure an x-ray mirror’s surface-slope profile is necessary to ensure that the information derived from it is a true reflection of reality.
In this work, researchers from the ALS X-Ray Optics Laboratory (XROL) collaborated with software and nanofabrication small businesses, as well as colleagues from Germany, to develop a way to improve the accuracy of x-ray metrology instruments. Agencies such as NASA and DOE are interested in this work to maximize the benefits of state-of-the-art space telescopes and diffraction-limited synchrotron projects such as the ALS Upgrade (ALS-U).
The fingerprints of deterministic polishing
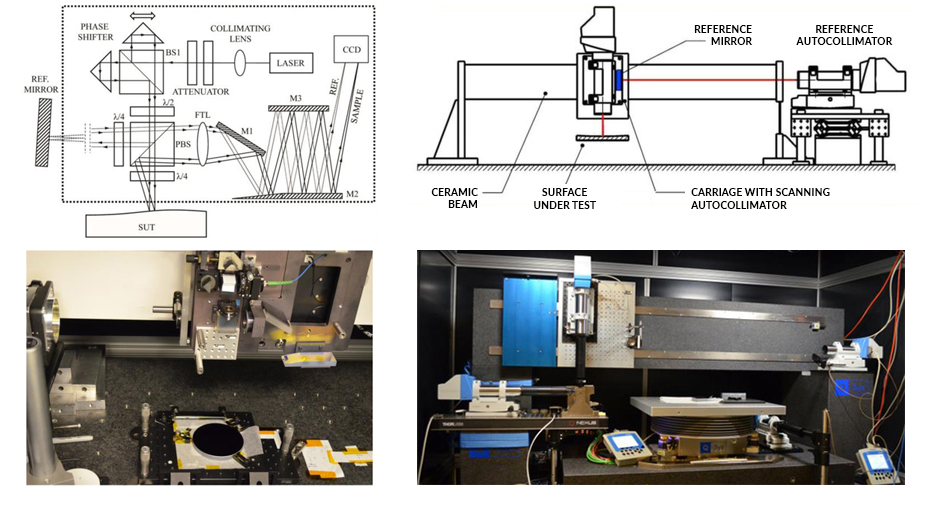
X-ray mirrors have challenging requirements for surface quality, specified over extremely broad length scales, from a fraction of the x-ray wavelength to the total size of the optic (sub-nanometer to over a meter). Multiple tools are needed to characterize these optics, as no single tool can measure the entire range of spatial frequencies at which slope and/or height errors occur.
The low-to-middle range of spatial frequencies is especially important for x-ray optics fabricated using deterministic polishing (computer-driven polishing to a prescribed shape using, for example, an ion beam). Such optics often have quasi-periodic surface errors, like fingerprints, that occur at characteristic frequencies, determined by the size of the beam. Underestimation of slope errors in this range can lead to serious errors in the optics’ expected beamline performance.
Measuring the measurement
Metrology tools for optical surfaces in the problematic frequencies (roughly 0.13 to 0.5 mm-1) have been shown to have limited resolution in that range. While they capture the periodicity, the measured amplitude is smaller by a factor of two or three, depending on the period of the error.
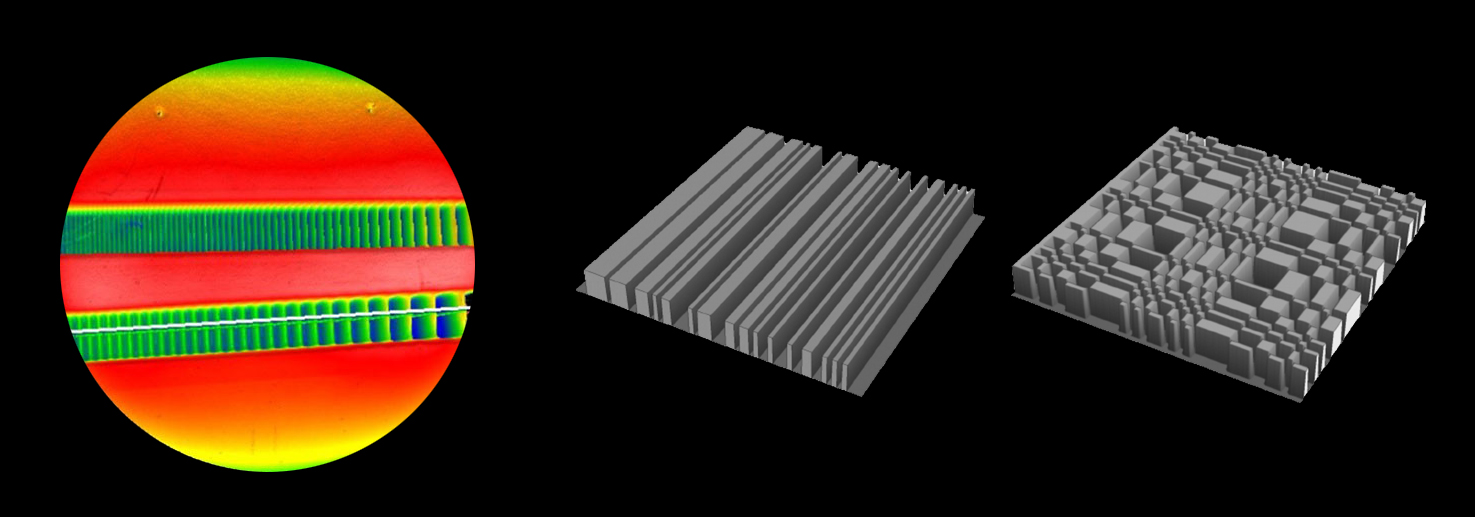
This underestimation was revealed using “chirped” test samples with grooves of increasing frequency and constant slope amplitude. Fabricated to exacting specifications at the Institute for Surface Modification (IOM) in Germany, the samples’ well-characterized surface profiles provide a much-needed check on the performance of surface-slope measurement tools.

Wiener filter applied to x-ray data
The researchers then applied an approach that was suggested in the 1940s by Norbert Wiener (the “father of cybernetics”). The mathematical procedure is commonly used today to reconstruct visual images by filtering out blur, but had not previously been applied to x-ray metrology. The missing ingredient was the ability to quantitatively judge the quality of the reconstruction using chirped test samples, as described above. Based on that data, the researchers parameterized the reconstruction procedure and developed it into a software package for one-dimensional slope metrology.
Next, the work will be expanded to two-dimensional metrology applications—more complex cases involving the use of pseudo-random binary arrays, fabricated at Berkeley Lab’s Molecular Foundry. A small-business technology transfer (STTR) proposal on this topic has been approved by NASA for Phase I funding (feasibility studies). A separate, but related proposal, to significantly improve stitching metrology based using super-resolution measurements, was recently submitted to the DOE STTR program.

Contact: Valeriy Yashchuk
Researchers: V.V. Yashchuk and I. Lacey (ALS), S. Rochester (Rochester Scientific, LLC), S. Babin (aBeam Technologies, Inc.), T. Arnold (Leibniz Institute of Surface Engineering, Germany, and Technische Univ. Dresden), H. Paetzelt (Leibniz Institute of Surface Engineering, Germany), F. Siewert (Helmholtz Center for Materials and Energy, Germany), and P.Z. Takacs (Surface Metrology Solutions, LLC).
Funding: Rochester Scientific, LLC; aBeam Technologies, Inc.; and U.S. Department of Energy Small-Business Technology Transfer (STTR) program. Operation of the ALS is supported by the U.S. Department of Energy, Office of Science, Basic Energy Sciences program.
Publications: V.V. Yashchuk, S. Rochester, I. Lacey, and S. Babin, “Super-resolution surface slope metrology of x-ray mirrors,” Rev. Sci. Instrum. 91, 075113 (2020), doi: 10.1063/5.0005556; and V.V. Yashchuk, I. Lacey, T. Arnold, H. Paetzelt, S. Rochester, F. Siewert, and P.Z. Takacs, “Investigation on lateral resolution of surface slope profilers,” Proc. SPIE 11109, 111090M/1-19 (2019), doi: 10.1117/12.2539527.
ALS SCIENCE HIGHLIGHT #431